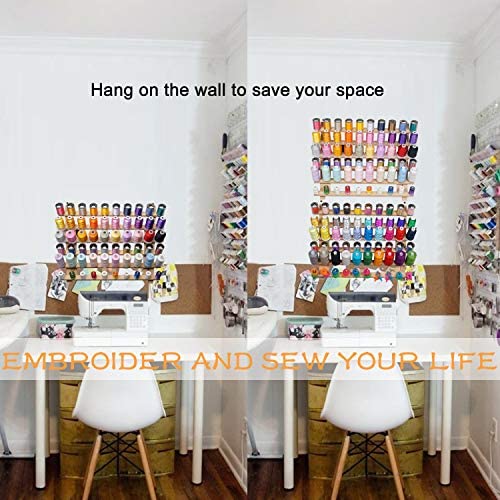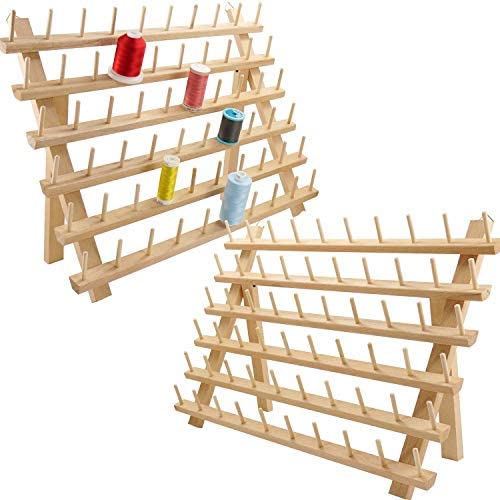
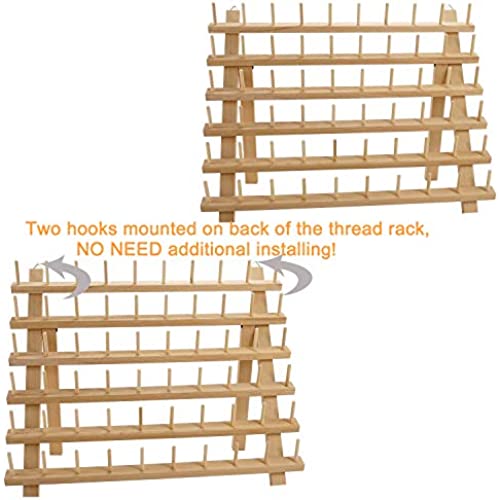
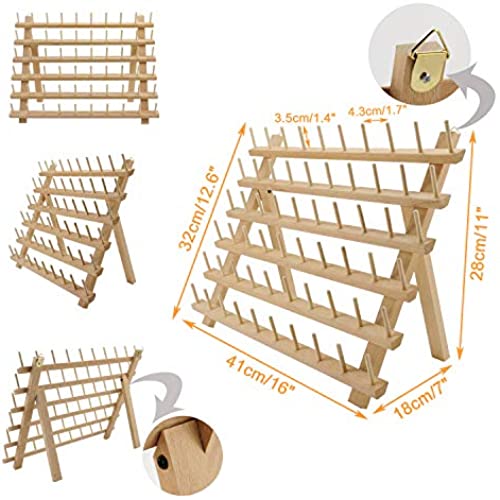
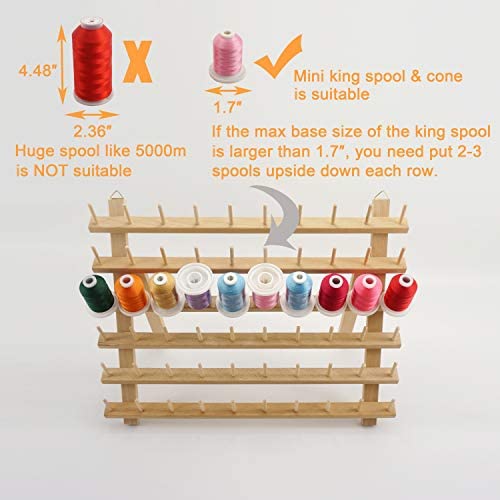
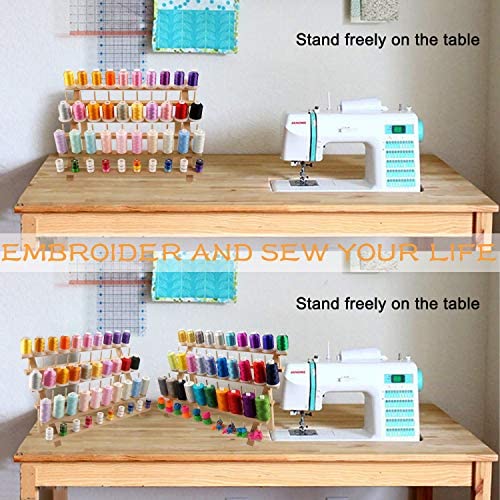
New brothread 2X60 Spools Wooden Thread Rack/Thread Holder Organizer with Hanging Hooks for Embroidery Quilting and Sewing Threads
-

Diane H Holycross
> 3 dayThis works great to hold my embroidery threads and doesnt take up too much space.
-
vlk
15-04-2025Its nice to be able to have my thread out and visible and sorted according to color.
-
Tyrique Williamson
> 3 dayNice quality, but even though it holds 60 spools, it is small. Love the baby spool holder, though. It is so helpful to have next to the sewing machine with one projects supplies on it!
-
Diane K.
> 3 dayIt was lighter weight than I expected. My original from WM is much sturdier. Had to be careful of splinters too
-
Adam T
> 3 dayIsnt it amazing how people shop for the absolute cheapest version of whatever they need and then complain that real human beings didnt spend hundreds of hours painstakingly crafting each individual one? Youve been searching for a cheap thread holder and now youve found it. Its exactly as you should now imagine it to be. It works. Its made of wood. Its held firmly together and it holds spools of thread. It even hangs on the wall! I refer to it as singular because even though it ships as two separate racks, its very easy to add a couple of picture-hanging hooks to the bottom-rear of the feet of one of them to link them together into one big rack. Whats that? You dont know how to nail a hook into a piece of wood? The manufacturer should have included it already done? Dont we all sew? Arent we makers? What happened to that maker spirit? Yes, this piece is not completely finished by most peoples standards. You could use it as is, but theres a good chance youll want to finish the piece. That will involve sanding, staining and/or sealing. I decided to take the sanding & sealing route, mostly because I was out of wood stain. I sanded the entirety of both racks with a 150 grit sandpaper. You may need to resort to 100 grit if you have some significant rough patches. There should be no need to use a finer (higher) grit sandpaper. Given all the tight spaces, I see no other way to do this than manually. The only other option is to find a way to unseat all those pegs without breaking them. I couldnt think of a way. Once both pieces were fully sanded, I applied a single coat of oil-based polyurethane with a 1 paintbrush. If you arent familiar with PU or working with hazardous inhalants in general, you should probably stick with just a stain. PU is powerful stuff and takes a long time to dry, so a well-ventilated workspace is essential. It wouldnt be crazy to wear a respirator or gas mask while applying this stuff! And you cant just leave it outside because the wind will blow dirt and grass all over it. So you have to be creative about how to devise a well-ventilated, yet protected, space to apply the PU and allow it to dry. If you happen to have a sunroom in your house, youre all set. Also, it can be reasonably argued that a PU coating on something like this is overkill. At this point, I can mount this rack in a tree in my backyard and itll be fine for years. But my point is: Make it your own. The bones are solid, just finish it the way you like. And if that isnt good enough for you, then there is another listing that is fully complete at 3x the price. Have at it.