
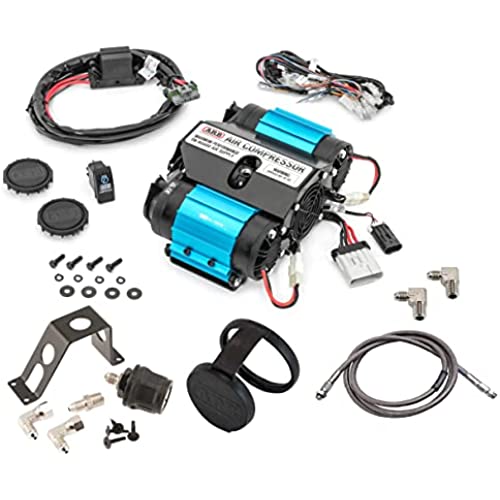
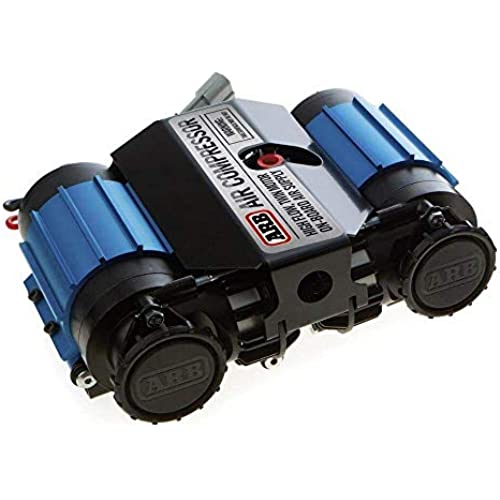


ARB INFLATION3 Twin High Performance Air Compressor CKMTA12 and Extension Hardware for Easy Installation and Connection in a New Printed Box, Ideal for Lockers, Horns, Tire Inflation and Air Tools
-

Daphne Upton
> 3 dayOverall a good product but the mounting system needs to be better thought out. I purchased this to replace a QuickAir 1 compressor mounted in the engine bay. The two are roughly the same size with the ARB being slightly taller. I have yet to hook this up to my existing 2.5 gallon on-board air tank and try airing my 35 tires back up so I cant speak for ARBs claims that this compressor is significantly better than their original smaller compressor in that respect. The silver tube at the top of the compressor is an air reservoir which is there solely to have a small reserve for actuating ARBs air locker(s). There are three ports. The tube is designed to have both locker solenoids installed on one side and the pressure shutoff switch installed on the opposite side (opposing one of the solenoids). The silver tube can be rotated to some extent to point the ports at a different angle and the silver tube can be rotated to position the solenoids on the opposite side of what is shown in the illustration. Theres quite a bit of flexibility for positioning the solenoids. Since I was replacing an existing compressor and didnt want to re-engineer the entire setup, I installed both solenoids on the silver tube vertically (air vent pointing up). Note: I run vent tubes from the solenoids to exhaust outside the engine bay under the chassis in a protected location. Passengers have complained about occasional exhausted fumes from the differential(s) drifting back into the cab if the window(s) are down. The issue is that there isnt enough clearance between the two solenoids when positioned parallel to the silver tube for the fittings on the solenoid vents to fit so I positioned the solenoids vertically. This significantly increases the height (or width if the compressor is rotated 90 degrees in the mount). If the compressor is mounted on a bracket on top of a fender well as mine is this may cause hood clearance issues. Fortunately, I had just enough space to clear the solenoids. The compressor itself can be rotated either way 90 degrees from the mount base plate and at any degree in between. Also a nice touch. That gives a lot of flexibility in mounting locations. The single negative point Ive run across to date is the mount bracket (base plate) and as far as Im concerned theres no reason for it. This is a simple problem and should have been considered by the engineer(s). Not a big surprise to me as this isnt the first ARB product where the engineering has fallen down on a simple, basic point while acing all the complicated issues. In order to mount this compressor, you must have clearance to the bolts that mount the black steel plate from the sides or bottom OR clearance from both ends to the bolts that mount the compressor heat sink to the black steel mount plate. The blue band is an aluminum heat sink that wraps around the compressor motor and attaches the motor to the base plate. The band/motor is attached to the black base plate by four Allen head screws - two from each end running parallel to the motor. Unfortunately the body is larger in diameter than the black steel base plate so its not possible to get a socket onto the bolts from the top. That means you must use the supplied carriage bolts and a boxed/open end wrench on the nuts from the side or a socket from the bottom. Presumably, the idea is to remove the motor/heat sink from the black steel base plate, attach the base plate to the body/fender/stand/etc., then re-attach the motor/heat sink to the mount plate via the four screws. Thats great as long as you have at least 6-8 of clearance AT BOTH ENDS or to EACH SIDE. The four screws run through rubber bushings which makes re-installing them very close to impossible using just finger tips. At the end of the day it took 6 hours to install the four screws and two of the carriage bolts (one one one side at one end, and one on the opposite side at the other end). It proved impossible to install the other two carriage bolts without drilling 3/4 holes through the fender and fender skirt. Obviously no thought was put into actually mounting this in real life where there wasnt a foot of clearance all the way around the compressor. The solution is simple. #1 Make the blue heat sink band a two piece clam shell unit. Half the job is already done. The band has two screws that loosen to allow the compressor to be rotated 90 degrees. Put two on the other side creating a clam shell setup. Take the four screws out, lift out the compressor, bolt everything up and put the compressor and four screws back in. #2 Make the black steel mount plate a two piece unit. From ARBs illustrations, it appears at first glance to be that way already. Its not. Make it a two piece unit so that each end of the bracket can be flipped 180 degrees so that the tabs point towards the ends of the compressor vs. the center. This would allow for using a small 1/4 socket wrench with a long extension to bolt the compressor to the body/fender/whatever and not require removing the compressor/heat sink assembly from the mount plate. The compressor comes with wiring and a bag full of hardware. Since I already had a compressor (rated at a higher amp draw) with dual air locker solenoids installed almost all of it turned into misc spare parts. One piece that I REALLY wish they would have put in the bag is the T that they supply in one of their other kits. The T screws into the port used for the on/off pressure switch and allows for the pressure switch to be installed and still have an open port to attach an air line for an air tank. Or, again a simple solution, would have been to have four ports on the silver tube. Overall the product seems to be decently built and I expect it to do what its supposed to do for some time. Were I doing this on a new vehicle without a previously installed air system, I probably wouldnt have gone with a compressor at all and used a QuickAir CO2 system to actuate the air lockers - or maybe I would have gone with mechanical lockers instead of ARB air lockers.
-
SandViper
> 3 dayI am creating a overlanding hybrid vehicle out of my 2018 Nissan Titan. Finally got this installed took some effort and some help from a friend who is a beast at fabrication at Distinctive Designz was able to get this mounted under the truck tucked right behind the gas tank. Ran hoses for the front and back and filter hoses. It works perfectly and is very convient having my own air for any number of reasons.
-
IRONBEAR
Greater than one weekWorks great , installed as an Air up compressor on my 2019 Jeep JLU Rubicon , Had to repurpose a bracket from a rear tire carrier light bracket due to ARB hasn’t made anything for the new Jeeps , had to extend Hot wire to reach the battery as well as the red wire from the harness to my accessories switch under the glove box , took a couple hrs , but all in all I’m really pleased how it came out . Hope this review helps .
-
Scott
Greater than one weekAbsolutely love this compressor, I mounted under my seat to avoid the heat of the engine to hopefully prolong its life.
-
Adolfo Gomez
> 3 dayWhile the compressor is good to go (5 stars) shipping and quality checks need improvement. I had three units shipped to me before i received one that wasnt broken or missing pieces. The original shipment I received clearly had returned hand written on the box from the previous customer. Im still waiting on my refund nearly three weeks later.
-
Gary J Sweeney
Greater than one weekVery good compact air compressor. The wiring harness was a bit short for the location I chose to install it (Rear Cargo Area) and extending it was slightly challenging due to the wire gage required to supply the correct voltage. If you intend on installing it in an engine bay or in the front of the cabin, the harness length should be fine. Also, it appears during assembly, the housing was bolted together slightly askew which marred the blue portion of the compressor. This is simply cosmetic, but the item was not listed as a scratch&dent.
-
jim stopinski
Greater than one weekGreat option for onboard air. Compact compared to other options. Multiple mounting options, sold separately.
-
Justin C.
> 3 dayWhere you been all my off roading life !!! With the 4 tire inflation system I make. And the twin compressor w/ 1 gallon ARB air tank. It take 7 to 8 minutes to air up all 4 - 35 tires from 10psi to 38psi. Worth every penny
-
TexasHunting
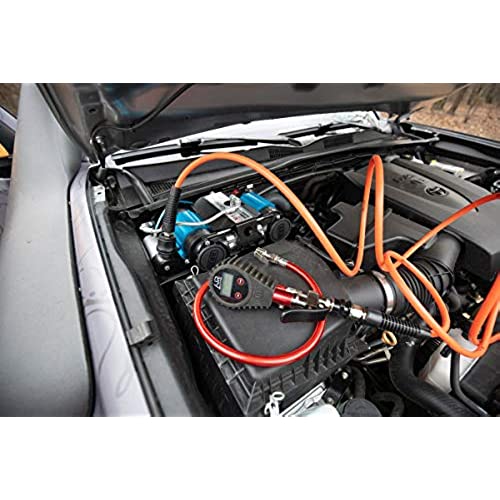
> 3 dayFirst, if I could give it 6 stars, I would. Before the nitty gritty details get fleshed out, you will love this compressor. Set up: it is very important to spend time to choose a location in/on your vehicle that is cool and within your skill set. If you choose the rear of your vehicle you will need large Guage battery wire to add onto the supplied wire (which is more than long enough for installation in the engine bay). If you choose to run the switch into your dash you will need to prepare, find two connections (an ignition source and power source). This means you need to have adequate skills to run wires through the firewall, find and splice wires, and cut an opening to mount the switch. Do yourself a favor: be prepared with a plan before you begin installation. Connections: I chose to keep the switch and all components in the engine bay, as seen in the picture. That said, Jeeps have gigantic engine bays. I used a fuse add a circuit. It cost $10 at Autozone and it took about 3 minutes to connect. I would recommend the same approach if you choose to install into the dash, it is that easy. Mechanical connections; it comes with all you need to set up but you will to buy the specific pieces you need for your setup (again, PLAN ahead). Use: I have 31 tires. It took me longer to let air out than the compressor did to inflate them. I aired down to 10psi then inflated to 45psi, it was done in about 10 minutes. Get yourself a Guage pressure tool and you will cut at least 1 minute off. In that ten minutes the compressor reached a few hundred degrees ( I know because I accidently touched it, big dummy). So, again, find a cool and open location. I am seriously amazed. The finished installation runs around $300, depending on your custom setup. For an inexpensive option this tool is well built and performs its given function quite well. I want one for each of my other vehicles. Buy it, NOW.
-
Mark C.
> 3 dayIts the best and fastest compressor out there. It does get hot but only if Im airing up several vehicles. I installed mine under the passenger seat to keep it cooler and cleaner.
